LinkedDataHub (LDH) is open source software you can use to manage data, create visualizations and build apps on RDF Knowledge Graphs.

What's new in LinkedDataHub v5? Watch this video for a feature overview:
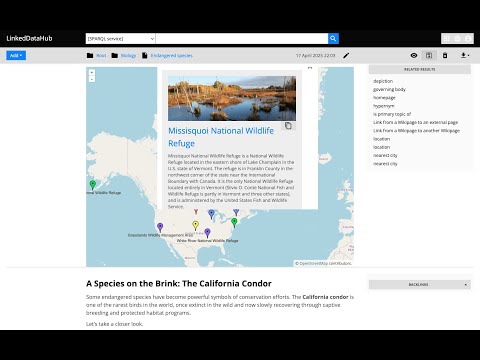


We started the project with the intention to use it for Linked Data publishing, but gradually realized that we've built a multi-purpose data-driven platform.
We are building LinkedDataHub primarily for:
- researchers who need an RDF-native FAIR data environment that can consume and collect Linked Data and SPARQL documents and follows the FAIR principles
- developers who are looking for a declarative full stack framework for Knowledge Graph application development, with out-of-the-box UI and API
What makes LinkedDataHub unique is its completely data-driven architecture: applications and documents are defined as data, managed using a single generic HTTP API and presented using declarative technologies. The default application structure and user interface are provided, but they can be completely overridden and customized. Unless a custom server-side processing is required, no imperative code such as Java or JavaScript needs to be involved at all.
XHTML documents can be edited in-place using a built-in RDFa-aware rich text editor — annotations link selected text directly to Knowledge Graph terms, embedding machine-readable RDF statements in the markup without leaving the page.
Follow the Get started guide to LinkedDataHub. The setup and basic configuration sections are provided below and should get you running.
LinkedDataHub is also available as a free AWS Marketplace product! 
It takes a few clicks and filling out a form to install the product into your own AWS account. No manual setup or configuration necessary!
Click to expand
bashshell 4.x. It should be included by default on Linux. On Windows you can install the Windows Subsystem for Linux.- Docker installed. At least 8GB of memory dedicated to Docker is recommended.
- Docker Compose installed
The ldh command line interface is attached to every release and needs only a Java 21 runtime; building it from source additionally requires Maven. The certificate and WebID scripts that remain in the bin/ directory require openssl and keytool (part of the JDK).
-
Fork this repository and clone the fork into a folder
-
In the folder, create an
.envfile and fill out the missing values (you can use.env_sampleas a template). For example:COMPOSE_CONVERT_WINDOWS_PATHS=1 COMPOSE_PROJECT_NAME=linkeddatahub PROTOCOL=https HTTP_PORT=81 HTTPS_PORT=4443 HOST=localhost ABS_PATH=/ OWNER_MBOX=john@doe.com OWNER_GIVEN_NAME=John OWNER_FAMILY_NAME=Doe OWNER_ORG_UNIT=My unit OWNER_ORGANIZATION=My org OWNER_LOCALITY=Copenhagen OWNER_STATE_OR_PROVINCE=Denmark OWNER_COUNTRY_NAME=DK -
Setup server's SSL certificates by running this from command line:
./bin/server-cert-gen.sh .env nginx ssl
The script will create an
sslsub-folder where the SSL certificates and/or public keys will be placed. -
Create the following secrets with certificate/truststore passwords:
secrets/client_truststore_password.txtsecrets/owner_cert_password.txtsecrets/secretary_cert_password.txtThe one you will need to remember in order to authenticate with LinkedDataHub using WebID client certificate isowner_cert_password.
-
Launch the application services by running this from command line:
make up -- --build
make uppasses its arguments on todocker-compose up. The--is required before any argument starting with-, otherwisemaketreats it as one of its own options.It will build LinkedDataHub's Docker image, start its container and mount the following sub-folders:
sslownerstores root owner's WebID certificate, keystore, and public keysecretarystores root application's WebID certificate, keystore, and public keyserverstores the server's certificate (also used by nginx)
datawhere the triplestore(s) will persist RDF datadatasetswhere LDH persists agent metadata filesuploadswhere LDH stores content-hashed file uploads It should take up to half a minute as datasets are being loaded into triplestores. After a successful startup you should see periodic healtcheck requests being made to the https://localhost:4443/ns URL.
-
Install
ssl/owner/keystore.p12into a web browser of your choice (password is theowner_cert_passwordsecret value)- Google Chrome:
Settings > Advanced > Manage Certificates > Import... - Mozilla Firefox:
Options > Privacy > Security > View Certificates... > Import... - Apple Safari: The file is installed directly into the operating system. Open the file and import it using the Keychain Access tool (drag it to the
localsection). - Microsoft Edge: Does not support certificate management, you need to install the file into Windows. Read more here.
- Google Chrome:
-
For authenticated API access use the
ssl/owner/cert.pemHTTPS client certificate withcurl, or thessl/owner/keystore.p12keystore beside it with theldhCLI. If you are running Linux with user other thanroot, you might need to fix the certificate permissions because Docker bind mounts are owned byrootby default. For example:sudo setfacl -m u:$(whoami):r ./ssl/owner/*
-
Open https://localhost:4443/ in the web browser or use the API, for example:
curl -k -E ./ssl/owner/cert.pem:<your cert password> -H "Accept: text/turtle" 'https://localhost:4443/'
ldh get -f ./ssl/owner/keystore.p12 -p <your cert password> --accept text/turtle 'https://localhost:4443/'
-
There might go up to a minute before the web server is available because the nginx server depends on healthy LinkedDataHub and the healthcheck is done every 20s
-
You will likely get a browser warning such as
Your connection is not privatein Chrome orWarning: Potential Security Risk Aheadin Firefox due to the self-signed server certificate. Ignore it: clickAdvancedandProceedorAccept the riskto proceed.- If this option does not appear in Chrome (as observed on some MacOS), you can open
chrome://flags/#allow-insecure-localhost, switchAllow invalid certificates for resources loaded from localhosttoEnabledand restart Chrome
- If this option does not appear in Chrome (as observed on some MacOS), you can open
-
MacOS: Chrome subdomain support: Chrome on macOS requires the server certificate to be installed to the System keychain to properly load resources from dataspace subdomains (e.g.,
admin.localhost:4443). Firefox is more lenient and will work without this step.- Open Keychain Access (Applications > Utilities > Keychain Access)
- Select System keychain in the left sidebar
- File → Import Items → select
ssl/server/server.crt - Enter your admin password when prompted
- Double-click the "localhost" certificate
- Expand the Trust section
- Set "When using this certificate:" to Always Trust
- Close the window (enter password again)
- Completely quit Chrome (Cmd+Q) and restart
Alternatively, use the command line:
sudo security add-trusted-cert -d -r trustRoot -k /Library/Keychains/System.keychain ssl/server/server.crt
-
.env_sampleand.envfiles might be invisible in MacOS Finder which hides filenames starting with a dot. You should be able to create it using Terminal however. -
On Linux your user may need to be a member of the
dockergroup. Add it using
sudo usermod -aG docker ${USER}and re-login with your user. An alternative, but not recommended, is to run
sudo make upClick to expand
A common case is changing the base URI from the default https://localhost:4443/ to your own.
Lets use https://ec2-54-235-229-141.compute-1.amazonaws.com/linkeddatahub/ as an example. We need to split the URI into components and set them in the .env file using the following parameters:
PROTOCOL=https
HTTP_PORT=80
HTTPS_PORT=443
HOST=ec2-54-235-229-141.compute-1.amazonaws.com
ABS_PATH=/linkeddatahub/
ABS_PATH is required, even if it's just /.
Since version 5.1.0, a single LinkedDataHub instance supports multiple dataspaces, each identified by a distinct subdomain (origin). Each dataspace consists of a pair of applications: an end-user app (e.g. https://northwind-traders.demo.localhost:4443) and an admin app on the admin. subdomain (e.g. https://admin.northwind-traders.demo.localhost:4443).
Dataspace configuration is split across two files:
config/dataspaces.trig— public metadata: origins (lapp:origin), ontologies, stylesheetsconfig/system.trig— internal wiring: SPARQL service bindings and application types (lapp:AdminApplication/lapp:EndUserApplication)
To add a new dataspace, add corresponding entries to both files. Relative URIs will be resolved against the base URI configured in the .env file.
urn: URI scheme, since LinkedDataHub application resources are not accessible under their own dataspace.
Since version 5.9.0, LinkedDataHub can mirror every document of a dataspace into a GitHub repository. Each document (named graph) becomes an N-Triples file, and every write (POST/PUT/PATCH/DELETE) becomes a commit authored with the agent's WebID — giving you a full history, audit trail, and undo capability using plain git tooling. Commits happen asynchronously in the background and are best-effort: if GitHub is unavailable or the token is invalid, writes succeed as usual and the failures are only logged.
Historical versions can be retrieved with the version query parameter using a commit SHA:
curl -k -E ./ssl/owner/cert.pem:<your cert password> -H "Accept: text/turtle" 'https://localhost:4443/my-doc/?version=<commit-sha>'Version responses are immutable and carry a Memento-Datetime header with the commit's datetime. They are subject to the same access control as the live document.
Versioning is disabled by default. To enable it for a dataspace:
- Create a GitHub repository (a private one is recommended) that will store the graph files.
- Obtain an access token: on GitHub, go to Settings > Developer settings > Personal access tokens > Fine-grained tokens > Generate new token. Under Repository access select Only select repositories and pick the repository from step 1; under Permissions > Repository permissions set Contents to Read and write. Generate the token and copy it (it starts with
github_pat_). A classic token with thereposcope works as well, but grants far broader access. - Describe the repository in
config/system.trigand link the application to it (an example is included in the file):<urn:linkeddatahub:apps/end-user> { <urn:linkeddatahub:apps/end-user> lapp:versioningRepository <urn:linkeddatahub:versioning/end-user> . } <urn:linkeddatahub:versioning/end-user> { <urn:linkeddatahub:versioning/end-user> a doap:GitRepository ; doap:location <https://github.com/OWNER/REPO> ; github:branch "main" ; github:pathPrefix "graphs" . }
- Put the token into
secrets/credentials.trig(create the file if it does not exist) as ana:authTokenof the repository resource:@prefix a: <https://w3id.org/atomgraph/core#> . <urn:linkeddatahub:versioning/end-user> { <urn:linkeddatahub:versioning/end-user> a:authToken "github_pat_..." . }
- Enable the
credentialssecret indocker-compose.ymlby uncommenting it in the top-levelsecrets:block and in thelinkeddatahubservice'ssecrets:list. - Restart with
make up. The startup log will confirm:Graph versioning enabled for application <...>.
Multiple dataspaces can be versioned into different repositories with different tokens. The token never appears in the environment or the process table — it is merged into the internal context dataset from the Docker secret, the same mechanism used for SPARQL service credentials.
Secrets used in docker-compose.yml:
owner_cert_password- Password of the owner's WebID certificate
secretary_cert_password- Password of the secretary's WebID certificate
client_truststore_password- Password of the client truststore
google_client_id- Google's OAuth client ID
- Login with Google authentication is enabled when this value is provided
google_client_secret- Google's OAuth client secret
credentials- TriG dataset (
secrets/credentials.trig) with service credentials such as SPARQL auth and graph versioning tokens, merged into the system dataset at startup
LinkedDataHub supports a range of configuration options that can be passed as environment parameters in docker-compose.yml. The most common ones are:
CATALINA_OPTS- Tomcat's command line options
SELF_SIGNED_CERTtrueif the server certificate is self-signedSIGN_UP_CERT_VALIDITY- Validity of the WebID certificates of signed up users (not the owner's)
IMPORT_KEEPALIVE- The period for which the data import can keep an open HTTP connection before it times out, in ms. The larger files are being imported, the longer it has to be in order for the import to complete.
MAX_CONTENT_LENGTH- Maximum allowed size of the request body, in bytes
MAIL_SMTP_HOST- Hostname of the mail server
MAIL_SMTP_PORT- Port number of the mail server
The options are described in more detail in the configuration documentation.
If you need to start fresh and wipe the existing setup (e.g. after configuring a new base URI), you can do that using
make dropIt asks for confirmation, then stops the services and removes their volumes before deleting the datasets, fuseki, ssl, and uploads folders. Stopping first matters: deleting those folders while the containers are running leaves Fuseki writing into directories that no longer exist.
ldh wraps the HTTP API into a single executable with convenient parameters. It can be used for testing, automation, scheduled execution and such. It is usually much quicker to perform actions using the CLI rather than the user interface, as well as easier to reproduce.
Every release attaches an ldh-<version>.tar.gz archive, which needs only a Java 21 runtime — no build tools and no source checkout:
tar -xzf ldh-<version>.tar.gz
export PATH="$PWD/ldh-<version>:$PATH"

ldh --help
To build it from source instead — the CLI lives in the cli subfolder and needs Java 21 and Maven:
make cliwhich prints the export PATH=... line to run afterwards. If you will be using LinkedDataHub's CLI regularly, add that export to your shell profile.
Commands authenticate with a WebID client certificate read from a PKCS12 keystore — ssl/owner/keystore.p12 for the owner. Options that repeat across commands can be set once as environment variables:
export LDH_CERT_FILE=./ssl/owner/keystore.p12
export LDH_CERT_PASSWORD=$(cat secrets/owner_cert_password.txt)
export LDH_BASE=https://localhost:4443/

ldh create-container --parent "$LDH_BASE" --title "Concepts" --slug concepts
ldh create-item --container "${LDH_BASE}concepts/" --title "Example" --slug example
Commands that create or append to a document print its URL as the only line on stdout, so they compose in shell pipelines: item=$(ldh create-item ...). The bin/ subdirectories became nested subcommand groups — ldh admin acl create-group, ldh content add-xhtml-block, ldh imports import-csv. See cli/README.md for the full command table and the differences from the scripts.
bin/ HTTP API scripts that ldh replaces are deprecated. The certificate and WebID tooling (webid-keygen.sh, webid-keygen-pem.sh, webid-uri.sh, webid-modulus.sh, server-cert-gen.sh) talks to no API and stays in bin/.
These demo applications can be installed into a LinkedDataHub instance using make install. You will need to provide the path to your WebID certificate as well as its password.
Web-Algebra enables AI agents to consume Linked Data and SPARQL as well as control and automate LinkedDataHub operations through natural language instructions. This innovative system translates human language into JSON-formatted RDF operations that can be executed against your LinkedDataHub instance.
Key capabilities:
- Natural Language to RDF Operations: Translate complex instructions into executable semantic workflows
- LLM Agent Integration: AI agents can compose and execute complex multi-step operations automatically
- Atomic Execution: Complex workflows are compiled into optimized JSON "bytecode" that executes as a single unit
- Model Context Protocol (MCP): Interactive tools for AI assistants to manage LinkedDataHub content
Example use cases:
Business Analytics:
Analyze quarterly sales performance from our Northwind dataset, identify the top 5 customers by revenue, and create an interactive dashboard showing regional sales trends with automated alerts for territories underperforming by more than 15%
FAIR Life Sciences Integration:
Query federated endpoints for protein interaction data from UniProt, gene expression profiles from EBI, and clinical trial outcomes from ClinicalTrials.gov, then integrate these datasets through SPARQL CONSTRUCT queries, create cross-references using shared identifiers, and embed the unified knowledge graph into an interactive research article with live data visualizations
Perfect for:
- Business intelligence automation and reporting
- Federated biomedical data integration and analysis
- AI-assisted research data discovery and linking
- Natural language interfaces to knowledge graphs
- Intelligent data processing and monitoring pipelines
See the Web-Algebra repository for setup instructions and examples of AI agents managing LinkedDataHub instances.
- contribute a new LDH application or modify one of ours
- work on good first issues
- work on the features in our Roadmap
- join our community
LinkedDataHub includes an HTTP test suite, run with make tests. It builds its fixtures with ldh, which make tests builds and puts on the $PATH for the run. The server implementation is also covered by the Processor test suite.

Please report issues if you've encountered a bug or have a feature request.
Commercial consulting, development, and support are available from AtomGraph.
- linkeddatahub@groups.io (mailing list)
- linkeddatahub/Lobby on gitter
- @atomgraphhq on Twitter
- AtomGraph on LinkedIn
- @atomgraph on YouTube